
There are so many things you can make with tortillas: burritos, fajitas, tacos, quesadillas, nacho chips, tostadas, taquitos and the list goes on. Mexican and Latin American food is popular all over the world. As a result, tortillas can often and conveniently be found in most grocery outlets and we have grown accustom to them. What a shame! They are nothing like a tortilla should be: soft, fresh and slightly springy. The best you can get at a store are rubbery, too chewy and rigid. Although tortillas are technically bread, they require no yeast and no time to rise. In fact, the dough only needs about 10 minutes to rest before you can start rolling it out. They are quick and simple enough to whip up during the week and still have a fun and versatile meal every time. If you try this, you will never buy factory made tortillas again!
You need four things to make tortillas (all of which may be in your kitchen right now): flour, oil, a pinch of salt and water. That's it! A pile of flour will take only about 20 minutes to become fresh, warm tortillas. Here's a step-by-step breakdown of the process.
Ingredients
2 cups all-purpose flour (feel free to use whole wheat)
3 tbsp oil (olive, vegetable, canola, etc...)
1 tsp salt
3/4 cup water
Cooking spray or an additional tbsp or so of oil for light frying
Makes 8 tortillas.
In a bowl, stir the salt into the flour.

Combine with the oil and water and form into a dough. I use a rubber spatula for this part because the dough is very sticky.

When fully incorporated, turn the dough onto a lightly floured surface. Knead the dough until smooth. This will only take a couple of minutes.

Set the dough aside and let it rest for at least 10 minutes.

Once rested, turn the dough back onto a lightly floured surface.

Cut the dough into quarters.
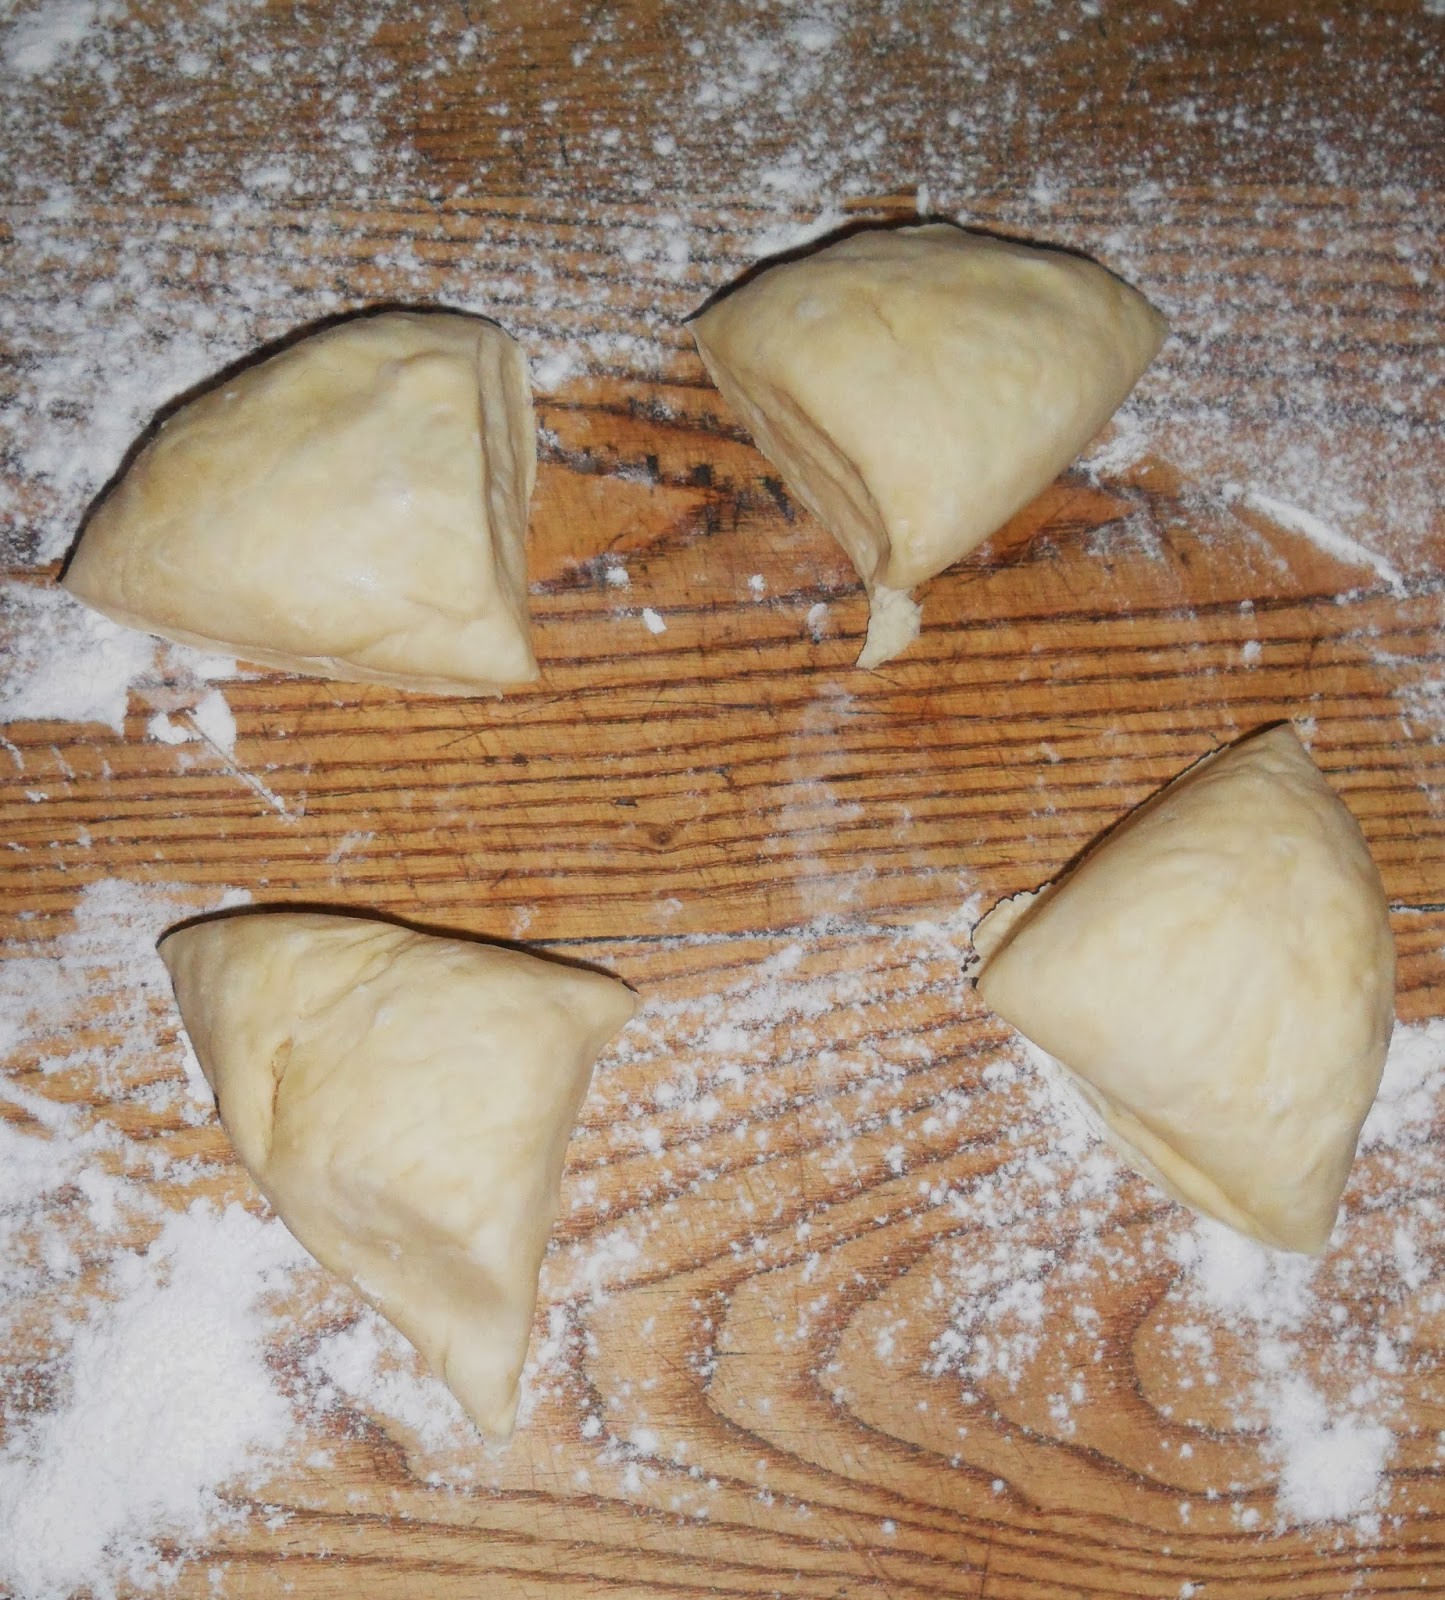
Then cut each quarter in half to make 8 pieces. Form each piece into flat, circular discs.

Lightly flour your surface again and roll each piece of dough out into a tortilla shape. Each tortilla should be about 7"/18 cm wide. Don't worry about making perfectly round shapes. You can buy a tortilla press which is a round, iron clamp that will squish the dough into a perfect circle but personally I like the random imperfections of making them by hand. It has a comforting, rustic charm and insists that they are homemade.

Reserve your tortillas aside while you carry on rolling the other ones. I recommend stacking them unevenly so that you can easily grab a lip from whichever one is on top of the pile and easily peel it off the stack. If you're going to use your tortillas right away that's all you need. If you're going to use them later, you can put them in the fridge or freeze them but I recommend a sheet of parchment or wax paper between each tortilla to keep them from sticking.
Spray a skillet with cooking spray or add 1 tbsp of oil and brush it so that it is thinly and evenly coated. Warm over medium heat. Place a tortilla on the pan and let it cook for about a minute or so, The first one may take a little longer to cook than the rest. You will know it is ready to flip when bubbles begin to form in the dough.

Use a spatula to flip the tortilla over and cook the other side (should take the same amount of time - about a minute).

Keep your tortillas warm until you are ready to use them. How simple is that? And so rewarding! It's amazing how sometimes the simplest of things can be so inexplicably satisfying.
Here's an example of what you can do with them, fajitas! I sautéed some shrimp with red pepper, shallot and jalepeño with a little bit of chili powder I also chopped some heirloom tomatoes with scallions and fresh cilantro and wrapped everything up in a tortilla with some low fat sour cream and this awesome hot sauce that my friend brought back for me from her Habitat for Humanity trip to Honduras. They were so good!

I hope this has inspired you to try this yourself. Fire any questions you may have in the comments section and rest assured I will be back soon with more fantastic recipes and techniques you can try at home.
Until then,
B
No comments:
Post a Comment